Struggling with outdoor lighting projects that fail prematurely? Poor installation can ruin a great design. This leads to costly repairs and unhappy clients, damaging your reputation.
To master outdoor architectural lighting, focus on five key areas. Start with detailed pre-planning. Ensure robust waterproofing and electrical stability. Fine-tune the optical effects at night. Finally, always design for easy future maintenance. These steps guarantee a successful, long-lasting project.
Over my many years in the lighting industry, I have seen countless projects. Some are truly breathtaking. Others, unfortunately, miss the mark. The biggest difference is often in the installation details. It is not just about hanging lights. It is about using light to sculpt a building and bring its character to life. Good installation is an art and a science. Let's break down the process I use on every single project to ensure success.
Why is Pre-planning the Most Critical Step in Any Lighting Project?
Ever started an installation only to find the plan does not work on-site? This creates chaos, delays, and budget overruns. Do not let poor planning derail your project's success.
Pre-planning is critical because it sets the foundation for everything.1 You must define your lighting goals, viewing angles, fixture layout, and wiring paths first. This avoids costly on-site changes2 and ensures the final result matches the vision. Proper planning is the blueprint for success.

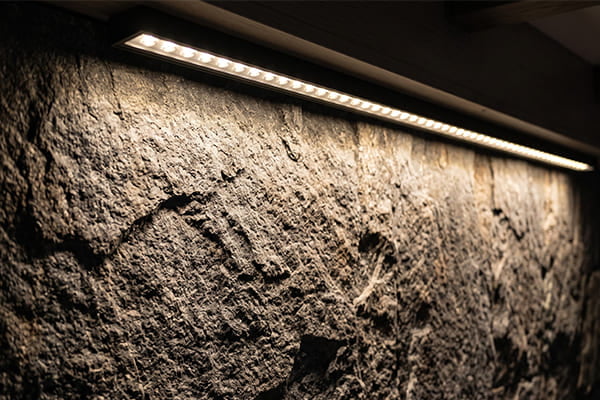
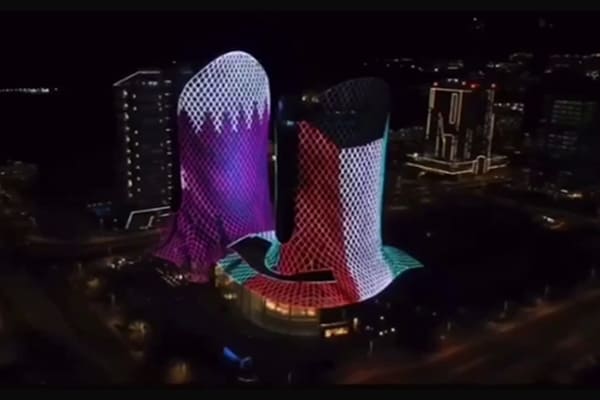
A successful lighting project begins long before the first fixture is unboxed. It begins with questions. What is the goal of the lighting? Who will be looking at it, and from where? Answering these questions first saves so much time and money later. I remember a project in Dubai where the client wanted to highlight an intricate stone facade. The planning phase was intense. We had to decide between washing the wall or grazing it.
Wall Washing vs. Wall Grazing
These two techniques create very different effects, and you must choose the right one in the planning stage.
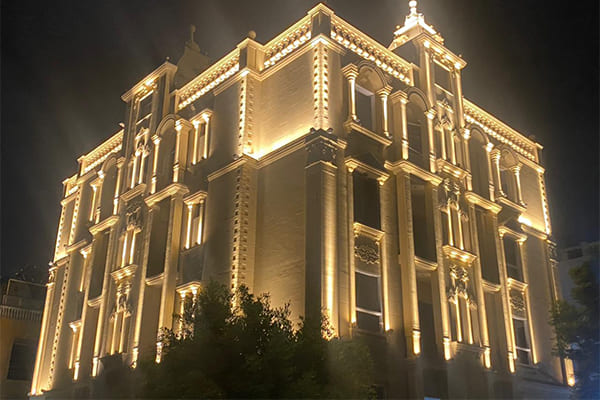
- Wall Washing creates a smooth, even layer of light. It hides imperfections and makes a surface look clean and uniform. You achieve this by placing fixtures a certain distance from the wall and using a wider beam angle.
- Wall Grazing is the opposite. You use it to emphasize texture. By placing the fixture very close to the wall with a narrow beam, you create dramatic shadows that reveal the surface's depth and character. This was the technique we chose for the Dubai project. The result was stunning because the light caught the texture of every single stone.
Here is a simple table to help you decide:
| Feature | Wall Washing | Wall Grazing |
|---|---|---|
| Goal | Create uniform brightness, hide texture | Emphasize texture, create drama |
| Fixture Placement | Away from the wall | Very close to the wall |
| Beam Angle | Medium to Wide (25°-60°) | Narrow to Very Narrow (5°-15°) |
| Effect | Makes the wall look flat and smooth | Creates strong shadows and highlights |
Once you have your lighting goals and techniques, you can map out fixture locations and, just as importantly, the wiring routes. A clear plan ensures everyone on the team, from the architect to the electrician, is working toward the same vision.
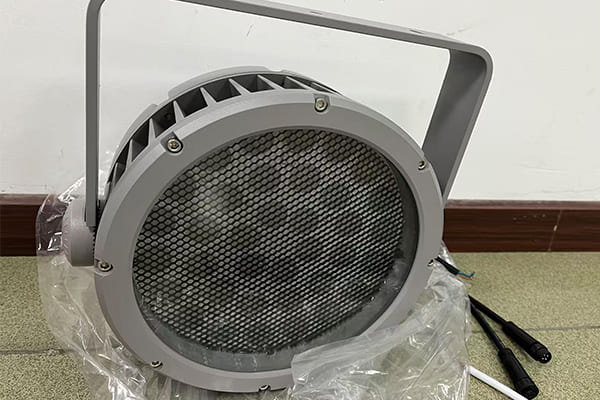
How Can You Guarantee Your Outdoor Lighting Survives the Elements?
Worried about your beautiful lighting installation failing after the first rainstorm? Water ingress is the number one killer of outdoor fixtures, leading to expensive callbacks and warranty claims.
To guarantee longevity, focus on superior waterproofing. Always use fixtures rated IP65 or higher.3 Implement "drip loops" for all cables, use IP68 connectors, and seal connections inside professional waterproof junction boxes. This protects your investment from the harshest weather.
I cannot stress this enough: waterproofing will make or break your outdoor project. I have seen projects fail in months because of shortcuts here. You must think of your entire system as a sealed unit. It starts with the fixture itself. Never use anything rated less than IP65 for outdoor applications. For areas that might flood or for underwater use, you need IP67 or IP68.4
Beyond the Fixture
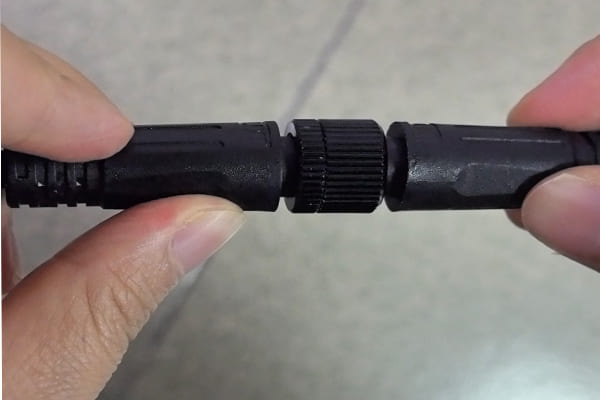
The fixture's IP rating is just the start. The connections between fixtures are the weakest links.
- The Drip Loop: This is the simplest and most effective trick. Before a cable enters a fixture or a junction box, you let it hang down and loop back up. Water running down the cable will now drip off the bottom of the loop instead of flowing right into your connection.5 It costs nothing and saves everything.
- Professional Connectors: Do not just twist wires together and wrap them in electrical tape. It will fail. Use screw-terminal IP68 waterproof connectors. We provide these with our systems because they are essential.
- Junction Boxes, Not Glue: I have seen people try to seal connections with silicone glue. It breaks down in the sun and eventually lets water in. Use a proper IP-rated waterproof junction box filled with potting gel for all your connections.
Another thing to consider is temperature. In places with extreme temperature swings, like parts of Russia we have supplied, this is a major issue. We always advise leaving a little slack in the cables during winter installations. This creates a thermal expansion loop that prevents the cables from becoming too tight and snapping when it gets even colder.6
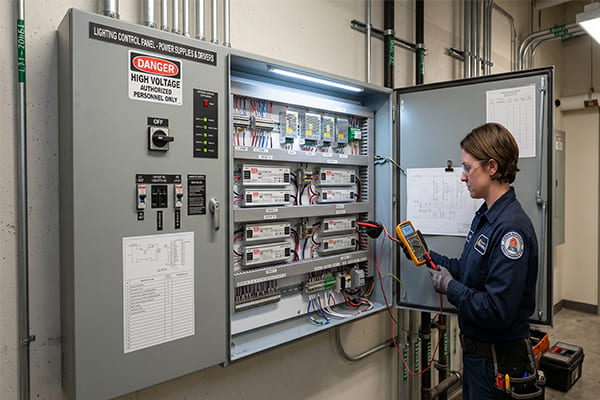
What Ensures the Electrical Stability and Control of Your System?
Have you ever seen flickering lights or fixtures at the end of a line that are noticeably dimmer? These electrical issues undermine the entire project, making your work look unprofessional.
For stable power, manage voltage drop in DC24V systems, keeping it under 5% by using thick cables (2.5mm² or more). For DMX512 control, always add a 120-ohm terminator at the end of the line7. Use signal amplifiers for runs over 80-100 meters.
Getting the power and data right is as important as the waterproofing. Two main issues often come up: voltage drop and DMX signal integrity.
Fighting Voltage Drop
Low-voltage DC systems, like the DC24V systems we often use, are safe and efficient. But electricity loses energy as it travels down a long wire. This is called voltage drop. The fixture at the end of a long run will get less voltage, making it dimmer than the ones at the start. To fight this:
- Keep your voltage drop below 5%.8
- Use thicker wires. Thicker wires have less resistance.9
- Plan your power supply locations to minimize the length of your cable runs.
Here is a general guide for DC24V systems. Always check your specific fixture's power needs.
| Max Run Length (Meters) | Recommended Copper Cable Size (mm²) |
|---|---|
| 0 - 15m | 1.5 mm² |
| 15 - 25m | 2.5 mm² |
| 25 - 40m | 4.0 mm² |
Ensuring Clean DMX Control
DMX512 is the standard for controlling dynamic lighting.10 It's a robust system, but you must follow the rules. The most common mistake I see is people forgetting the terminator. A DMX signal is like a person shouting down a hallway. If there is a wall at the end, the voice echoes back, causing confusion. The 120-ohm terminator is like a sound-absorbing panel at the end of the hall. It stops the signal from reflecting, which prevents flickering and erratic behavior. On a large bridge project, we had DMX runs spanning hundreds of meters. Without proper signal boosters for long distances (over 80-100m) and terminators at each universe's end, the system would have been a chaotic mess. These small components are non-negotiable for large-scale projects.
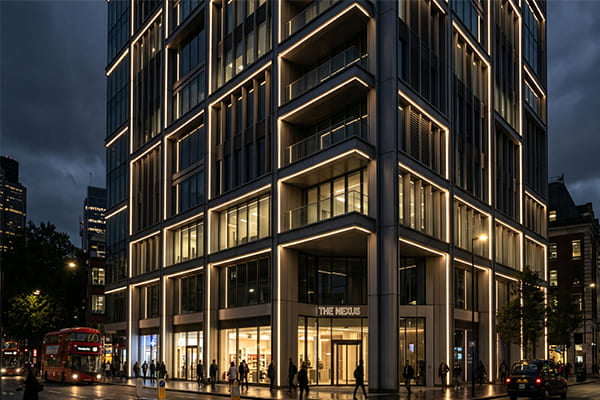
How Do You Achieve Stunning Visual Effects Without Annoying Glare?
You have installed the lights, but instead of highlighting the building, they just create blinding glare. This distracts from the architecture and creates an uncomfortable experience for viewers.
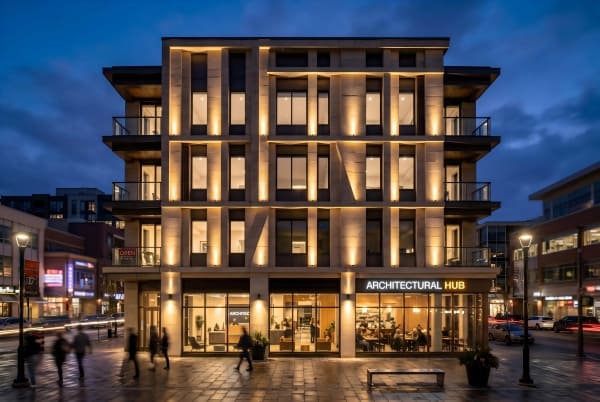
The key is to light the surface, not the sky. Hide the light fixtures whenever possible to focus on the building itself. Use accessories like shrouds, snoots, and honeycomb louvers to strictly control glare. Always perform final adjustments at night for the best results.
Great lighting is about what you see, not the light source itself. The goal is to make people remember the beautiful building, not the bright fixture that's lighting it. This is the art of glare control. Glare is wasted light. It causes discomfort for people and contributes to light pollution in the sky.
Tools for Glare Control
Your best friends in the fight against glare are fixture placement and accessories.
- Hide the Fixture: The best way to control glare is to hide the source. Can you conceal the fixture in landscaping, behind a ledge, or within an architectural detail? If you can't see the fixture, you can't be blinded by it.
- Use Accessories: When you cannot hide the fixture, use accessories to shape the light and block it from going where you do not want it. Shrouds and visors act like blinders, cutting off light at the sides. Honeycomb louvers are fantastic for limiting the viewing angle so you only see the light when you are directly in front of it.
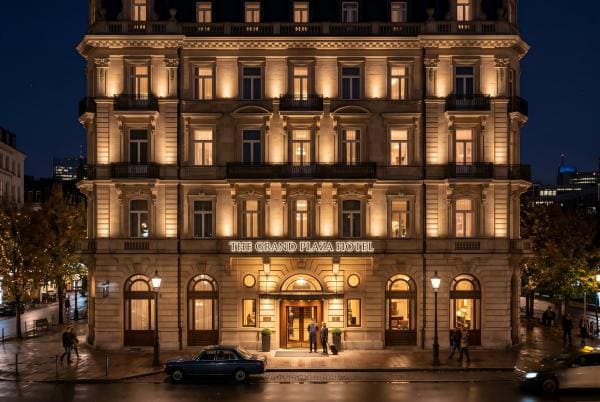
Most importantly, you must do your final aiming and focusing at night. I spent hours one night on a scaffold, personally adjusting fixtures on a historic hotel facade. A change of just one or two degrees in angle made the difference between a flat, boring wash and a dramatic, three-dimensional effect. You simply cannot see this level of nuance during the day. Your eyes, the building, and the darkness are your final tools for creating the perfect look.
Why Should You Plan for Maintenance Before the First Light is Even Installed?
The project looks great on opening night, but what about five years from now? Inaccessible components can turn routine maintenance into a costly and disruptive nightmare for the building owner.
Planning for maintenance from day one saves future costs and headaches. Ensure power supplies and drivers are in accessible locations. Consider heat dissipation in your design to extend LED life. A well-designed system is one that is easy to maintain and service.
A truly successful project is one that still looks great five or ten years after the installation. To achieve that, you must think about future maintenance from the very beginning. Even the best LED products have a lifespan. The component that usually needs service first is the driver or power supply.
Design for Access
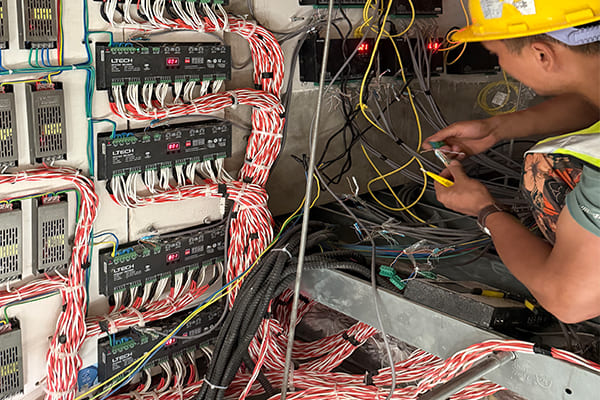
Where you place the drivers is one of the most important maintenance decisions you will make.
- Centralize and Consolidate: Whenever possible, locate your drivers in an easily accessible, climate-controlled room or service panel. This is far better than placing individual drivers next to each fixture, 50 feet up a wall.
- Think About Heat: LED drivers and fixtures generate heat. Heat is the enemy of electronics. Ensure there is proper ventilation around your drivers and fixtures. Do not pack them tightly together in a sealed box with no airflow. Good heat dissipation directly leads to a longer product life.
I was once called to fix a system another company installed. The driver for a crucial accent light was buried behind a permanent marble panel. We had to break a very expensive panel to replace a simple driver. We learned from their mistake. Now, we preach "maintenance-first" design to all our partners and provide detailed drawings showing where every key component is. It adds huge value for the building owner and ensures the system you built has a long, brilliant life.
Conclusion
Excellent lighting installation is not about the fixtures. It’s about careful planning, robust execution, and a thoughtful design that makes the architecture itself the star of the show.
"Project Management for Construction: Construction Planning", https://www.cmu.edu/cee/projects/PMbook/09_Construction_Planning.html. Project-management guidance supports the role of early planning in defining scope, schedule, resources, and execution controls before work begins; this is general project evidence rather than lighting-specific proof. Evidence role: expert_consensus; source type: institution. Supports: Pre-planning is the foundation for successful outdoor lighting projects.. Scope note: The evidence is likely to support planning as a general project-management principle, not uniquely outdoor architectural lighting. ↩
"a review on change order and assessing causes affecting change ...", https://www.academia.edu/35068961/A_REVIEW_ON_CHANGE_ORDER_AND_ASSESSING_CAUSES_AFFECTING_CHANGE_ORDER_IN_CONSTRUCTION. Construction-management research links inadequate early planning and late design changes with increased cost and schedule impacts; the support is contextual because the studies may address construction generally rather than façade lighting specifically. Evidence role: general_support; source type: paper. Supports: Detailed planning helps avoid costly on-site changes.. Scope note: The source may not measure outdoor lighting installations directly. ↩
"IP code - Wikipedia", https://en.wikipedia.org/wiki/IP_code. IEC ingress-protection classifications define IP65 as dust-tight and protected against water jets, providing a standards basis for using higher IP-rated equipment outdoors; the standard does not by itself guarantee suitability for every exposure condition. Evidence role: definition; source type: institution. Supports: Outdoor fixtures should use sufficiently high ingress-protection ratings, such as IP65 or higher.. Scope note: IP ratings describe tested ingress resistance, but outdoor suitability also depends on installation, materials, UV exposure, corrosion, and maintenance. ↩
"IP code - Wikipedia", https://en.wikipedia.org/wiki/IP_code. Ingress-protection references define IP67 and IP68 as ratings involving temporary or continuous immersion tests, supporting their relevance where flooding or underwater exposure is possible; the exact suitability depends on the manufacturer’s stated test depth and duration. Evidence role: definition; source type: institution. Supports: Flood-prone or underwater applications require IP67 or IP68-rated equipment.. Scope note: IP68 conditions are manufacturer-specified and may vary by product, so the rating alone is not complete proof of underwater durability. ↩
"[PDF] Electrical Panel Upgrade - Residential - Upland", https://www.uplandca.gov/Documents/Permits%20and%20Licenses/Building%20and%20Safety%20Forms/Electrical%20Panel%20Upgrade-Residential.pdf?t=202602101139420. Electrical-installation guidance describes drip loops as a method for preventing water from following a cable or conductor into equipment openings; the source supports the physical installation principle rather than a quantified failure reduction. Evidence role: mechanism; source type: government. Supports: A drip loop helps prevent water from traveling along a cable into a fixture or junction box.. Scope note: The evidence may explain the method without providing statistics on how much it reduces failures. ↩
"(PDF) Measurement of the force induced by thermal expansion of ...", https://www.academia.edu/90013986/Measurement_of_the_force_induced_by_thermal_expansion_of_conductor_of_mv_cables_and_impact_on_MV_joints. Engineering references on thermal expansion explain that cable and conduit materials change length with temperature, supporting the need to allow slack or movement in installations exposed to temperature swings; this is a general materials principle rather than a lighting-specific test result. Evidence role: mechanism; source type: education. Supports: Cable slack can accommodate thermal contraction and expansion in outdoor temperature swings.. Scope note: The source may establish thermal expansion and contraction generally, not a specific required slack length for lighting cables. ↩
"DMX512 (aka DMX) Info - Electronic Theatre Controls Inc", https://support.etcconnect.com/ETC/Getting_Started_with_ETC_and_FAQ/DMX512-Info. DMX512 technical guidance specifies terminating the end of a DMX data link, commonly with a 120-ohm resistor, to reduce signal reflections on the differential bus; this supports the mechanism for preventing erratic behavior. Evidence role: mechanism; source type: institution. Supports: A 120-ohm terminator should be placed at the end of a DMX line to reduce signal reflections.. Scope note: Termination requirements can depend on the physical network layout and compliant equipment, but end-of-line termination is standard practice for DMX daisy chains. ↩
"voltage drop: 2% or 3% or 5% - Mike Holt's Forum", https://forums.mikeholt.com/threads/voltage-drop-2-or-3-or-5.2564977/. Electrical-design guidance commonly treats a maximum voltage drop of about 5 percent across feeders and branch circuits as a practical limit for acceptable equipment performance; this supports the rule of thumb but local codes and product specifications may differ. Evidence role: expert_consensus; source type: institution. Supports: Voltage drop in low-voltage lighting systems should generally be kept under about 5 percent.. Scope note: The 5 percent value is a common design recommendation, not necessarily a universal legal requirement for every DC24V lighting system. ↩
"Resistance in a Wire - PhET", https://phet.colorado.edu/sims/html/resistance-in-a-wire/latest/resistance-in-a-wire_en.html. Basic electrical theory, including the resistance relation R = ρL/A, shows that a conductor with larger cross-sectional area has lower resistance for the same material and length; this directly supports the statement. Evidence role: mechanism; source type: education. Supports: Thicker wires have lower electrical resistance.. ↩
"DMX512 - Wikipedia", https://en.wikipedia.org/wiki/DMX512. The ANSI E1.11 DMX512-A standard specifies a digital data transmission protocol widely used for lighting-control equipment, supporting the description of DMX512 as a standard control method for dynamic lighting. Evidence role: definition; source type: institution. Supports: DMX512 is a standard protocol for controlling dynamic lighting systems.. Scope note: The standard defines the protocol; it does not imply DMX512 is the best choice for every lighting-control application. ↩