Your building’s flat facade looks dull and lifeless at night. You are missing a huge opportunity to make a statement. Learn how different beam angles1 can add stunning depth and drama.
The best way to sculpt a building with light is to combine different beam angles1. Use narrow beams2 (1-15°) to highlight columns and textures for a dramatic effect. Then, use wide beams3 (45°+) for wall washing to create a smooth, even base layer of light. This combination adds dimension and visual interest.

It sounds simple, but the real magic is in the details. Getting the right effect means understanding which beam to use, where to place it, and what technical problems to avoid. As a manufacturer, I've seen how these details can make or break a project. Let's break it down so you can get it right every time.
How Can Narrow Beams Create Dramatic Vertical Lines?
Your building looks short and unremarkable at night. You want it to stand tall and grab attention. Narrow beams are the key to drawing the eye upward and making a strong impression.
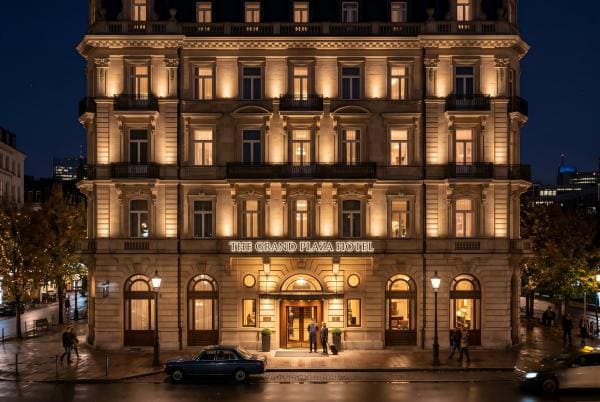
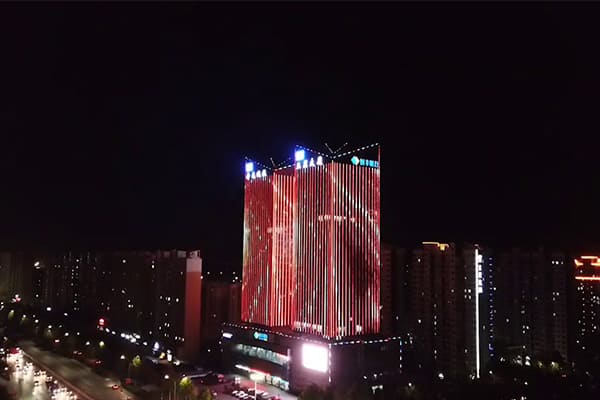
Use narrow beam angles1, typically between 1 and 15 degrees, to light up vertical elements like columns or decorative pillars. This technique makes the building appear taller. It's also perfect for highlighting specific details from a distance, creating a sense of drama and precision.
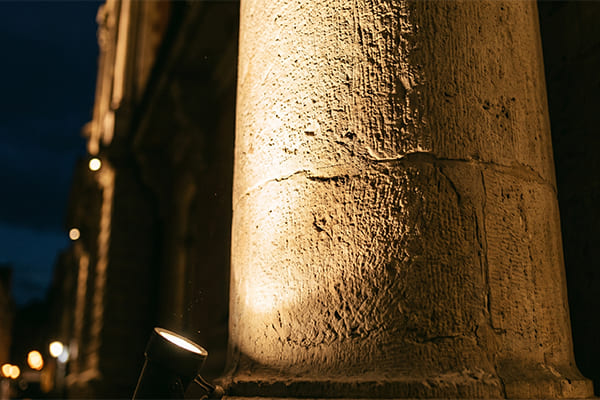
A narrow beam acts like a focused spotlight. It tells people exactly where to look. When you aim a tight beam of light up a tall column, you create a powerful vertical line that draws the eye skyward. This instantly adds a sense of height and grandeur to any structure. But it’s not just about height. This technique is also fantastic for what we call "grazing4."
The Power of Precision and Grazing
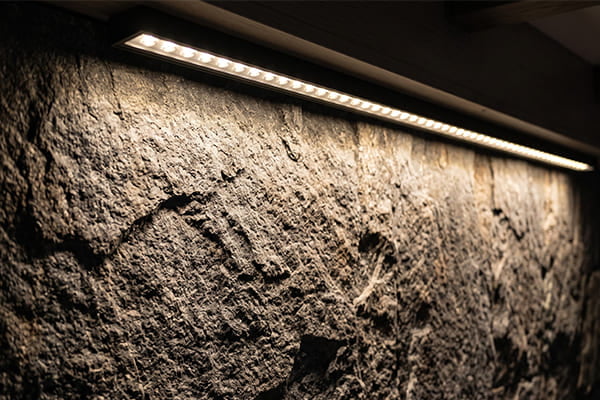
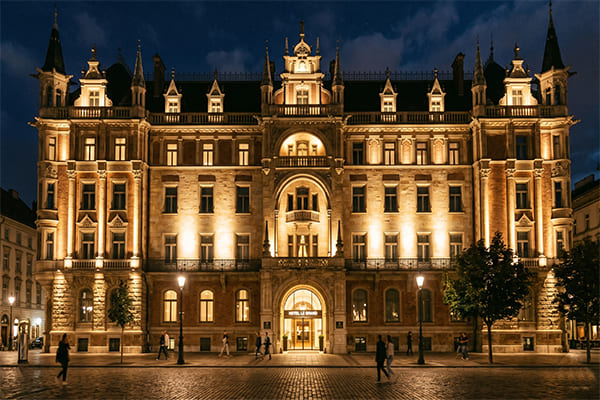
Grazing is when you place a light fixture very close to a textured surface, like rough stone, brick, or artistic concrete. The light shoots across the surface at a very small angle. This creates strong highlights and deep shadows, which makes the texture of the material pop. A flat, boring wall can suddenly look rich and full of character. It's one of my favorite ways to bring a building's materials to life after dark.
A Critical Production Note
Here is something we run into all the time in production. A client will ask for a 5-degree beam angle. But a 5-degree lens does not always create a 5-degree final beam. The fixture's housing and cover can sometimes widen the beam to 7 or 8 degrees. So, I always ask my clients, "Do you need a 5-degree lens, or do you need the finished light to produce a 5-degree effect?" It’s a small clarification that prevents big headaches on site. Always specify the final output angle you need.
| Light Type | Common Narrow Angles | Best For... |
|---|---|---|
| Spotlight | 3-15 degrees | Highlighting distant architectural details5 |
| In-Ground Light | 5-15 degrees | Uplighting columns and pillars from the ground |
| Linear Wall Grazer | 8-15 degrees | Emphasizing wall textures with the grazing4 effect |
| Flood Light | 10-15 degrees | Accenting specific features on a facade |
When Should You Use Wide Beams for a Flawless Facade?
Your lighting creates harsh shadows and uneven bright spots. The building looks patchy instead of grand. Wide beams are the solution for creating a smooth, uniform canvas of light.
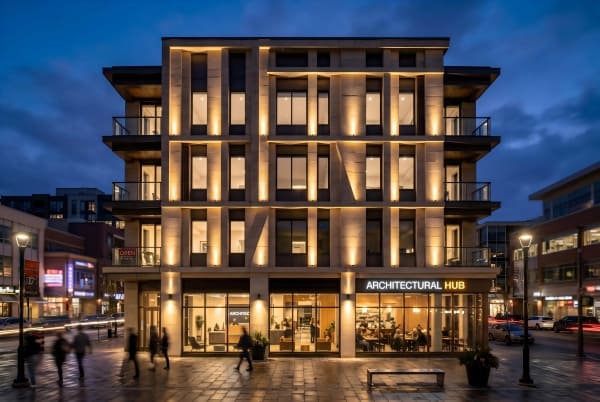
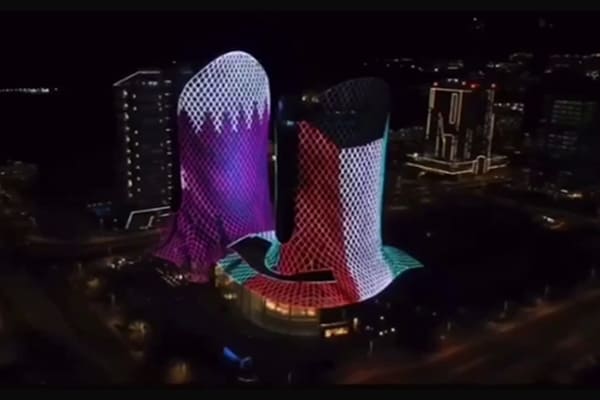
Use wide beam angles1, from 45 to 60 degrees or more, for a technique called "wall washing." This method evenly covers large, flat surfaces like curtain walls or facades with big signs. It provides a uniform base light, reduces shadows, and makes the building look clean and expansive.
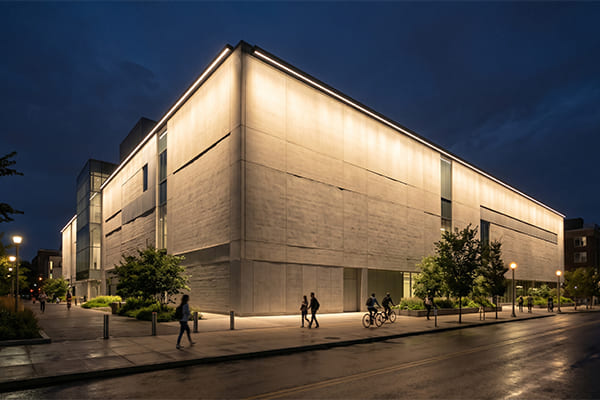
Think of wide beams3 as the base coat in a painting. They create the foundational layer of light that everything else is built upon. While narrow beams2 create drama and highlight details, wide beams3 provide the overall context. They ensure there are no large, distracting dark areas on the facade, which can look like "black holes." This creates a softer, more cohesive and professional look.
The Art of Wall Washing
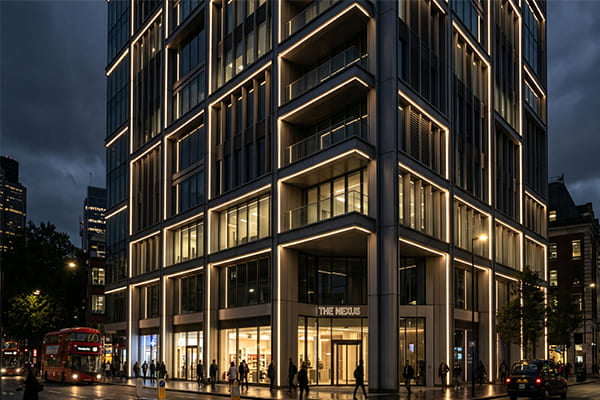
The goal of wall washing is to make a surface look perfectly flat and evenly lit. This is great for modern buildings with large glass curtain walls or simple, clean facades. The wide, soft light minimizes textures and shadows, giving the building a sleek and open feel. It’s also used to balance the high contrast created by narrow beams2. After you've used narrow beams2 to pick out columns, you can use a wide beam wash in the background to soften the overall look and tie everything together.
The Secret to Seamless Lighting: Asymmetrical Beams
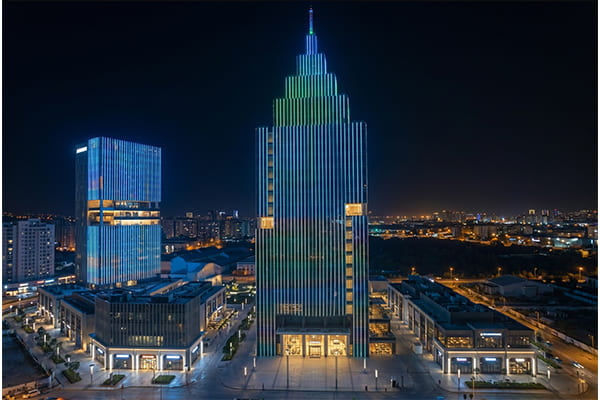
For the absolute best wall washing effect, especially with linear fixtures, I almost always recommend an asymmetrical beam, like 10*60 degrees. This special lens shapes the light so that it spreads wider horizontally than it does vertically. When you place two linear fixtures end-to-end, this beam shape allows the light to overlap perfectly. This eliminates the dark spots you can get between fixtures, creating a truly seamless wall of light. It’s a pro tip that makes a huge difference. Other fixtures, like pixel lights, have very wide 120-degree beams for media facades, while sill lights can have a 180-degree beam to perfectly frame a window.
| Beam Type | Common Angles | Primary Use |
|---|---|---|
| Wall Washer | 45-60 degrees | Uniformly lighting large, flat surfaces |
| Linear Washer | 10x60, 15x45 degrees | Creating a seamless wash of light between fixtures |
| Pixel Light | 110-120 degrees | Media facades, large-area general illumination |
| Window Sill Light | 180 degrees | Framing windows with a wide, soft glow |
What Technical Details Can Make or Break Your Lighting Project?
Your design looks great on paper, but the real-world result is dim and patchy. Technical mistakes are costly. Understanding these key factors ensures your vision becomes a reality on the building.
Three technical details are crucial for success. You must account for the Inverse Square Law6 (light gets dimmer with distance), plan your fixture spacing7 carefully to avoid dark spots, and choose the right light source (like RGB vs. RGBW8) for your color needs. Getting these right is essential.
I've seen too many projects fail not because the design was bad, but because the technical execution was flawed. A beautiful concept can fall apart if the light isn’t bright enough to reach the top of the building or if there are ugly dark patches between fixtures. Let’s look at the issues I see most often and how to solve them.
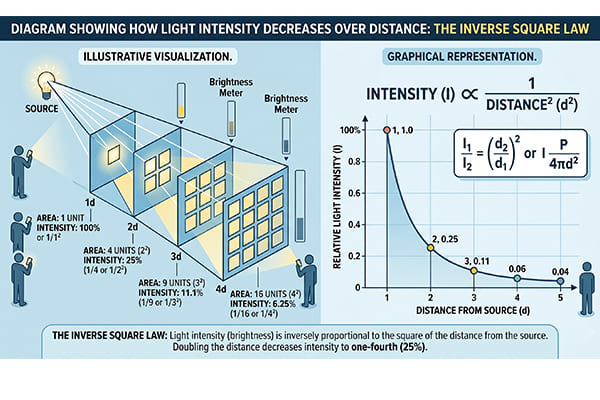
Battling Distance: The Inverse Square Law
The Inverse Square Law sounds complicated, but it's simple: light gets much dimmer the farther it travels. If you double the distance, the light intensity drops to just one-quarter of its original strength. For tall buildings, this is a huge challenge. My practical advice is this: for any building over 20 meters tall, you absolutely must use high-power LEDs9 (like the 3535 chips we use in our fixtures) combined with very narrow beams2 (1 to 8 degrees). This combination acts like a fire hose, pushing a concentrated beam of light all the way to the top with enough punch to still look bright.
Spacing, Overlap, and an Unforgettable Project
Fixture spacing is critical. For narrow beams2, you need to place fixtures closer together. If they are too far apart, you will get a "scalloped" or "sawtooth" effect of bright spots and dark gaps on the wall. For wide beams3, you can space them farther apart and use the overlap to create a smooth wash.
I'll never forget a project in Saudi Arabia. We supplied powerful 144W DMX RGBW floodlights with a 5-degree beam. The client wanted a pure white light option. But when they mixed Red, Green, and Blue to create white, the very narrow beam caused color separation. At the bottom of the wall, you could see hints of red and green instead of a pure white. It was a classic scalloping issue caused by the narrow optics. My solution was simple. I told them, "Your fixtures are RGBW, which means they have a dedicated White LED chip. If you want a perfect white, just use the 'W' channel. Use the RGB mix for colored scenes." They changed the programming, and the problem was solved instantly.
Don't Forget CRI and Power Factor
Finally, two numbers matter for quality: CRI and PF. CRI, or Color Rendering Index, tells you how accurately a light source shows the true colors of a surface. For architectural lighting, you want a high CRI (above 80, preferably 90+) so that the brick looks like brick and the stone looks like stone. Power Factor (PF)10 measures how efficiently the fixture uses electricity. A high PF (above 0.9) means it’s an efficient, high-quality product that won't waste energy, which is a big deal on large-scale projects.
Conclusion
Mastering beam angles1 transforms flat facades into dynamic sculptures11. By combining narrow, wide, and asymmetrical beams12, you can create depth, drama, and a truly memorable building that stands out.
Understanding beam angles is crucial for effective lighting design, enhancing the aesthetic appeal of buildings. ↩
Narrow beams create dramatic effects and highlight architectural features, making them essential for impactful designs. ↩
Wide beams provide uniform light coverage, reducing harsh shadows and enhancing the overall appearance of a building. ↩
Grazing highlights textures and adds depth to surfaces, transforming ordinary walls into visually striking elements. ↩
Incorporating architectural details into lighting design can elevate the overall impact and beauty of a structure. ↩
Understanding this law is vital for ensuring adequate light intensity, especially for tall buildings. ↩
Proper fixture spacing prevents dark spots and ensures a seamless lighting effect, crucial for professional results. ↩
Choosing the right light source affects color quality and design outcomes, making this distinction important for projects. ↩
High-power LEDs are essential for achieving bright, effective lighting in large-scale architectural projects. ↩
A high PF indicates energy efficiency, which is essential for sustainable and cost-effective lighting solutions. ↩
Discover how innovative lighting techniques can turn ordinary buildings into captivating visual experiences. ↩
Asymmetrical beams provide a unique lighting distribution, perfect for achieving seamless washes in architectural designs. ↩