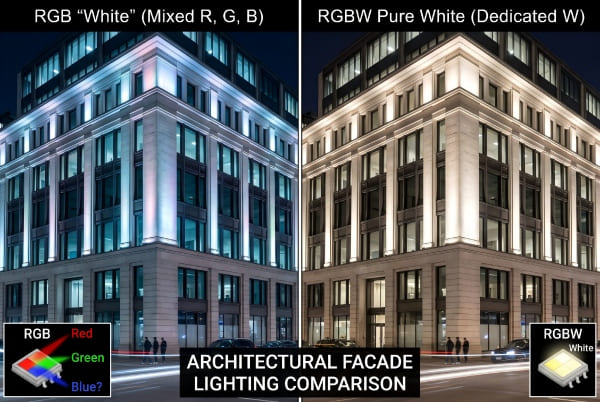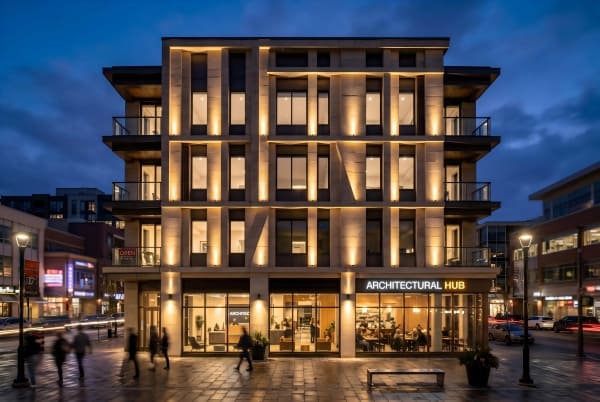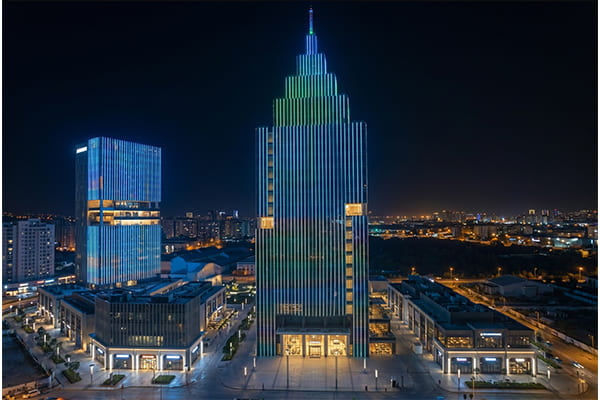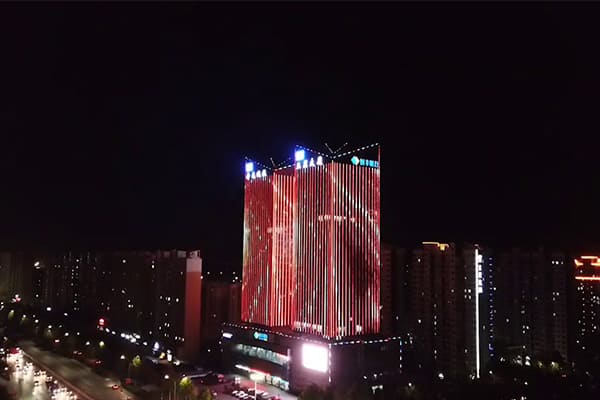
Struggling with ugly light spots ruining your beautiful facade design? This common problem can make a high-end project look unprofessional and cheap. But the solution is surprisingly straightforward.
To avoid light spots in linear facade lighting, you must combine four key elements: select high-density LED fixtures with diffusers and asymmetric lenses1, maintain a correct installation distance (D≥1.5P)2, use concealed installation with seamless connections, and choose matte facade materials that diffuse light naturally3.
I've seen millions of dollars spent on lighting projects, only to have the final result ruined by distracting "hot spots" or dark patches. It's frustrating for everyone involved. The good news is that you don't need a degree in optical physics to solve this. I've spent over a decade in this business, and I've boiled it down to a system. By following a few core principles from the very beginning, you can guarantee a smooth, uniform, and high-end lighting effect every time. Let's break down this system step-by-step, so you can apply it to your own projects.
How does choosing the right linear light prevent spots from the start?
You found a linear light that looks great in the catalog, but on-site, it creates a dotted mess. Now the project is delayed, and the client is unhappy.
Choose high-density LEDs, like 48 LEDs per meter or more. Pair them with a milky white diffuser cover and an asymmetric optical lens, such as 10°×60°. This combination pre-blends the light inside the fixture, stopping spots before they even form.
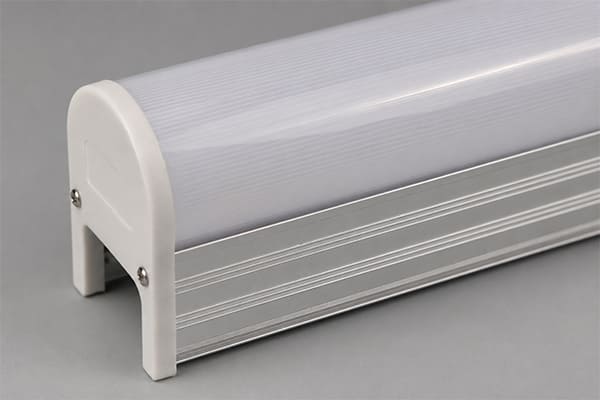
The fixture itself is your first line of defense against light spots. Think of it as controlling the problem at the source. I remember a project for a new skyscraper in Dubai. The architect wanted a perfectly smooth river of light flowing up the building's columns. The first sample from another supplier looked like a string of Christmas lights. The individual LED chips were too far apart. We fixed it by focusing on three things. First, we used lights with a high density of LEDs. The closer the LEDs are to each other, the easier it is for their light to overlap and blend.4 This is the foundation. Second, we used a fixture with a milky, or opal, diffuser cover. A clear cover does nothing, but a diffuser cover acts like frosted glass. It scatters the light from each LED5, softening the sharp points and blending them into a single, continuous line. Finally, we used an asymmetric lens. For wall washing, a lens like a 10°×60° is perfect.6 It shapes the light into a wide fan that washes up the wall (the 60° part) while keeping it focused horizontally (the 10° part). This directs the light exactly where it needs to go efficiently.
| Feature | Bad Choice (Causes Spots) | Good Choice (Prevents Spots) | Why it Matters |
|---|---|---|---|
| LED Density | Low (e.g., 30 LEDs/meter) | High (e.g., 48+ LEDs/meter) | Reduces the "dot" effect at the source. |
| Cover | Clear / Transparent | Milky / Opal Diffuser | Blends individual LED points into one line. |
| Optics | No lens or simple symmetric lens | Asymmetric Lens (e.g., 10°×60°) | Shapes and directs light effectively for wall washing. |
What is the correct installation distance for seamless facade lighting?
You bought the best lights, but they still create spots on the wall. The contractor blames the fixture, but the real issue is how they were installed, leading to costly rework.
Follow the D≥1.5P rule. 'D' is the installation distance from the light to the wall, and 'P' is the pitch, or space between each LED chip. This simple formula gives the light enough room to blend perfectly.
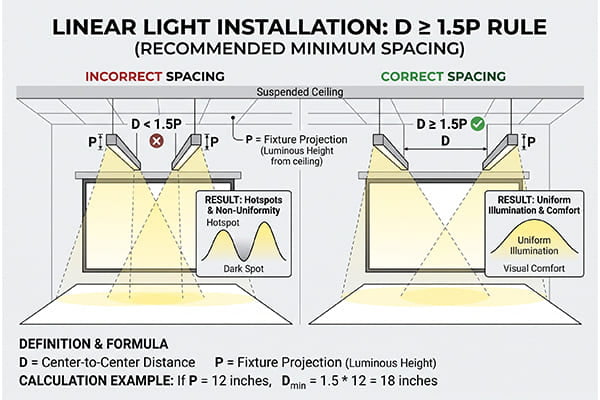
After choosing the right fixture, where you place it is the next critical step. The D≥1.5P formula is a rule of thumb I live by. It means the distance the light is mounted away from the wall (D) must be at least 1.5 times the distance between the individual LED chips (P). For example, if the chips in your linear light are 20mm apart, you must mount the fixture at least 30mm away from the facade surface (1.5 x 20mm = 30mm). This gives the light beams from each chip enough space to cross over and mix, creating a smooth wash.7 But what happens when the building's design doesn't give you that much space? I ran into this on a historic building renovation in Europe. The ledges were extremely narrow. We couldn't follow the formula. The solution was to use a fixture with a deep-channel aluminum housing. A deeper profile forces the light to bounce around and mix inside the fixture8 before it even hits the wall. It’s like giving the light a head start on blending. So even in a tight spot, we achieved a perfectly uniform effect. It’s about adapting your hardware to the real-world conditions of the job site.
What installation details are crucial for a spotless finish?
Your lights are well-chosen and correctly spaced, but you can still see ugly dark gaps between fixtures or blinding glare. It just looks unprofessional and cheap.
Use concealed installation methods to hide the fixtures. Always choose lights with bottom-exit cables for seamless, end-to-end connections. Finally, add anti-glare shields to perfect the "see the light, not the lamp" effect.
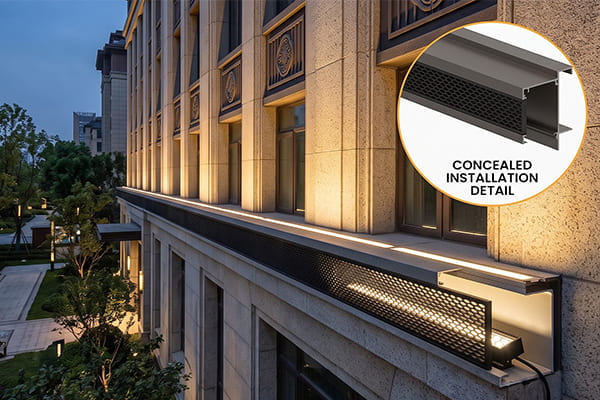
The final 10% of effort in the installation process makes 90% of the difference in the final look. It’s all in the details. First, great lighting design hides the source9. We use "concealed installation," which means tucking the fixtures into architectural grooves, behind parapet walls, or inside window reveals. This way, the building itself appears to glow from within. Second, you have to eliminate the dark gaps between fixtures. This is a classic rookie mistake. Many lights have cables that come out of the side, which forces a small gap between each unit. That gap creates a dark spot on the wall. The professional solution is to use fixtures with bottom-exit or back-exit cables. This allows you to butt the fixtures directly end-to-end, creating one unbroken line of light. I remember for a luxury hotel entrance, the architect insisted that guests looking up from the ground should see no glare at all. We solved this with the third key detail: anti-glare accessories. These can be simple shields, baffles, or louvers that attach to the fixture. They physically block the view of the bright LEDs from normal viewing angles.10 All you see is the beautiful, softly lit surface. This commitment to detail is what separates an average job from a truly stunning one.
How do facade materials interact with light and create spots?
Your lighting plan looked perfect on the computer, but on the real building, it's a disaster of hotspots and glare. The facade material itself is fighting against your design.
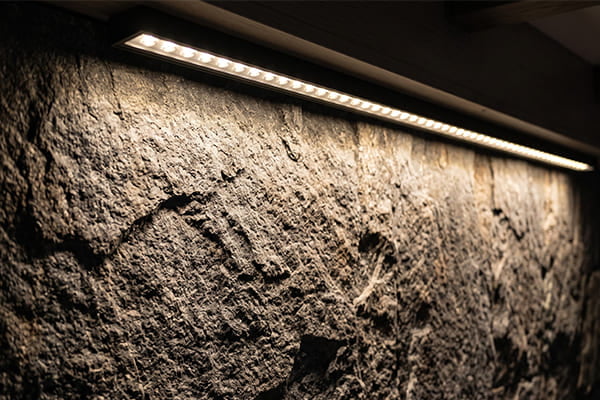
Avoid aiming linear lights directly at highly reflective surfaces like polished stone or glass. Instead, aim for matte, rough surfaces like textured paint or rough-faced stone. These materials naturally diffuse light, doing the hard work for you.
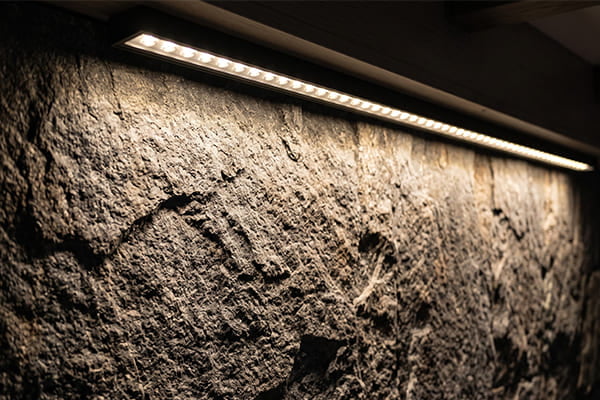
The surface you are lighting is just as important as the light you are using. Different materials react to light in completely different ways. I once consulted on a project where the team wanted to graze a facade made of polished black granite. I warned them it would reflect every single LED dot, looking more like a cheap disco than a five-star building. They didn't believe me until we did a quick mockup on-site. They saw exactly what I meant. A shiny, mirror-like surface gives you a specular reflection; it reflects a perfect image of the light source.11 A matte, non-shiny surface gives you a diffuse reflection; it scatters the light in every direction. This scattering is your best friend. It naturally blends the light and hides minor imperfections. We saved that project by changing the plan to light the matte-finished concrete columns between the granite panels. The effect was beautiful and elegant. This is why you must always, always test your chosen light on a sample of the actual building material12. A small, ten-minute mockup can save you from a massive, expensive mistake.
| Facade Material | Reflection Type | Effect on Linear Light | Recommendation |
|---|---|---|---|
| Polished Granite/Marble | Specular | Creates harsh hotspots and reflects LED dots. | Avoid direct grazing. Use indirect lighting instead. |
| Glass Curtain Wall | Specular/Transparent | Creates intense glare and reflects the fixture. | Light from a distance or use a very wide beam. |
| Matte Finish Paint | Diffuse | Scatters light, creating a soft, even wash. | Excellent choice for wall washing. |
| Rough-faced Stone/Brick | Highly Diffuse | Excellent at hiding imperfections and blending light. | Ideal choice. The texture adds visual interest. |
Conclusion
Achieving a flawless, spot-free facade comes from a system: choose the right lights, use the correct spacing, master the installation details, and match the material. It's that simple.
"[PDF] Examining Perceptual Luminance Uniformity of Simulated Luminaire ...", https://www.energy.gov/eere/ssl/articles/examining-perceptual-luminance-uniformity-simulated-luminaire-patterns. A lighting-engineering reference on LED optics supports that diffusers scatter light and that secondary optics, including asymmetric distributions, shape beam spread for applications such as wall washing; this supports the optical mechanism rather than proving a specific facade installation will be spot-free. Evidence role: mechanism; source type: institution. Supports: A lighting-engineering source should explain that diffusers scatter light, higher LED density reduces point-source visibility, and asymmetric optics can shape light distribution for wall washing.. Scope note: Contextual support; uniformity still depends on fixture geometry, mounting distance, surface properties, and field conditions. ↩
"Toward Human-Aligned Luminance Measurement for Large-Format ...", https://arxiv.org/html/2512.23051v1. Research on emitter pitch and observer or target distance supports the general optical principle that greater distance relative to source spacing allows light from adjacent emitters to overlap and appear more uniform; it does not necessarily validate the article's exact D≥1.5P threshold for all fixtures. Evidence role: mechanism; source type: research. Supports: A neutral optical or LED-display/linear-lighting source should support the relationship between emitter pitch, distance, and perceived blending or uniformity.. Scope note: The cited source may support the geometric blending principle rather than the exact proprietary rule of thumb. ↩
"[PDF] Theory for Off-Specular Reflection From Roughened Surfaces", https://www.graphics.cornell.edu/~westin/pubs/TorranceSparrowJOSA1967.pdf. Educational optics sources define diffuse reflection as scattering from rough or matte surfaces in many directions, supporting the claim that such facade materials can soften and distribute incident light. Evidence role: definition; source type: education. Supports: An educational optics source should define diffuse reflection and explain why rough or matte surfaces scatter incident light in many directions.. Scope note: This supports the physical behavior of matte surfaces, not the aesthetic success of any particular facade design. ↩
"[PDF] Apparatus for Studying Human Perception of Luminaire Luminance ...", https://www.energy.gov/eere/ssl/articles/apparatus-studying-human-perception-luminaire-luminance-uniformity. Studies of LED-array uniformity show that emitter spacing and mixing distance are key determinants of luminance uniformity, supporting the article's statement that closer LED spacing makes beam overlap and blending easier. Evidence role: mechanism; source type: paper. Supports: A paper on LED arrays or luminaires should show that emitter spacing and optical mixing distance influence luminance uniformity.. Scope note: The source may address LED arrays generally rather than facade wall-washing fixtures specifically. ↩
"Imaging Through Random Diffusers Instantly without a Computer", https://cnsi.ucla.edu/january-26-2022-imaging-through-random-diffusers-instantly-without-a-computer/. Optics references describe diffusers, including frosted or opal materials, as surfaces that scatter transmitted light, supporting the statement that a diffuser cover can soften individual LED points. Evidence role: mechanism; source type: education. Supports: An optics source should explain that diffusers scatter or redistribute incident light, reducing sharp source images.. Scope note: This establishes the physical mechanism but not the exact degree of hotspot reduction for a given product. ↩
"Wall Wash Lens Architectural LED Linear Lights", https://glledus.com/pages/linear-light-wall-wash-lens. Architectural lighting guidance describes asymmetric beam distributions as useful for directing light onto vertical surfaces in wall-washing applications, providing contextual support for using a narrow-by-wide optic such as 10°×60°. Evidence role: general_support; source type: institution. Supports: A lighting design source should support that asymmetric beam distributions are commonly used to direct light across vertical surfaces for wall washing.. Scope note: The source should not be used to prove that 10°×60° is universally 'perfect'; suitability depends on setback, mounting height, and target surface. ↩
"APPENDIX A. ROADWAY LIGHTING DETAILS | FHWA", https://highways.dot.gov/safety/other/visibility/roadway-visibility-research-needs-assessment/appendix-roadway-lighting. Lighting-design references on wall washing note that luminaire setback and spacing influence beam overlap and illuminance uniformity on vertical surfaces, supporting the mechanism described here. Evidence role: mechanism; source type: institution. Supports: A lighting-design reference should explain that setback distance affects beam overlap, illuminance uniformity, and wall-washing performance.. Scope note: The source is likely to support the general relationship rather than a single guaranteed distance for all linear fixtures. ↩
"Miniaturized LED primary optics design used for short-distance color ...", https://pubmed.ncbi.nlm.nih.gov/27857291/. Research on LED mixing chambers and luminaire optics indicates that increasing the optical path and allowing multiple internal reflections can improve spatial mixing and output uniformity, supporting the article's explanation of deeper channels. Evidence role: mechanism; source type: paper. Supports: A paper or technical source should show that mixing chambers or increased optical path length can improve spatial uniformity of LED output.. Scope note: The support is contextual because actual performance depends on reflector finish, diffuser material, LED layout, and channel geometry. ↩
"Strategy Guideline: High Performance Residential Lighting", https://www1.eere.energy.gov/buildings/publications/pdfs/building_america/strategy_guideline_high_perf_lighting.pdf. Professional lighting-design guidance emphasizes source shielding and glare control as central to visual comfort, supporting the article's broader design principle that successful architectural lighting often conceals the bright source. Evidence role: expert_consensus; source type: institution. Supports: A professional lighting-design source should support the practice of controlling direct view of bright sources to improve visual comfort and architectural effect.. Scope note: This supports the design rationale, not a measurable guarantee of aesthetic quality. ↩
"Versatility in Glare Control | VERS-NANO-LOUVER (11) - QTL Lighting", https://www.qtl.lighting/blog/versatility-in-glare-control/. Lighting references on glare control describe louvers, baffles, and shielding elements as devices that limit direct view of bright sources at selected angles, supporting the statement that these accessories can block visible LEDs from normal viewing positions. Evidence role: mechanism; source type: institution. Supports: A lighting reference should explain that louvers, baffles, and shields restrict high-angle light and limit direct view of the light source.. Scope note: Effectiveness depends on geometry, mounting height, observer location, and luminaire brightness. ↩
"Specular reflection - Wikipedia", https://en.wikipedia.org/wiki/Specular_reflection. Physics references define specular reflection as mirror-like reflection from a smooth surface, supporting the claim that polished facade materials can preserve visible images of light sources. Evidence role: definition; source type: encyclopedia. Supports: A physics or encyclopedia source should define specular reflection as mirror-like reflection from a smooth surface.. Scope note: This is a definition-level source; real facade reflections also depend on curvature, finish quality, and viewing angle. ↩
"Facade Lighting Techniques that Elevate Architecture and Improve ...", https://www.youtube.com/watch?v=-pOaDpix36s. Architectural lighting guidance commonly treats on-site or material mockups as a method for evaluating beam distribution, glare, color, and surface interaction before final installation, supporting the article's recommendation to test the chosen light on the actual facade material. Evidence role: expert_consensus; source type: institution. Supports: A professional lighting or architectural source should support mockups as a way to evaluate lighting effects on actual materials before installation.. Scope note: The source supports mockups as good practice, not the necessity of testing in every project. ↩