How Do I Choose the Right Beam Angle for Flood Lights?
Choosing the right flood light seems easy until you see the options: 5°, 15°, 30°, 60°. Pick the wrong one, and your beautiful design fails. You get ugly hot spots, wasted light spilling into the sky, or a beam that dies out halfway up a wall. The secret is knowing the simple trade-off between distance and coverage.
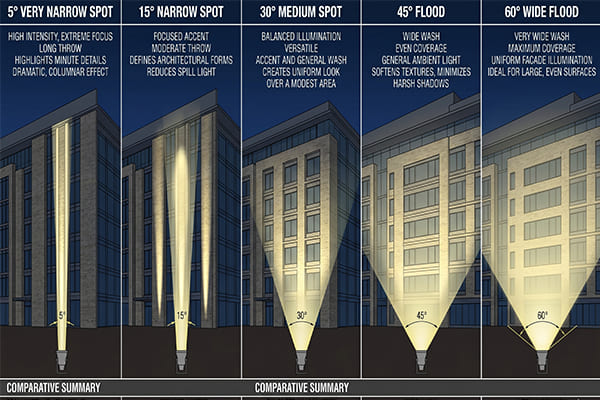
Choose a narrow beam angle1 (5°-15°) for long-distance, focused light on tall structures or specific details. Select a wide beam angle2(30°-60°) for broad, even coverage of walls and landscapes at a shorter distance. It’s a trade-off: focus for reach, or width for coverage.
This single decision can make or break your entire outdoor lighting3 project. I’ve seen it happen hundreds of times. A great fixture with the wrong beam angle4 is still a failure. Let’s break down each common angle so you can choose the right tool for the job every time.
When Should I Use a Very Narrow Beam Angle (5°-10°)?
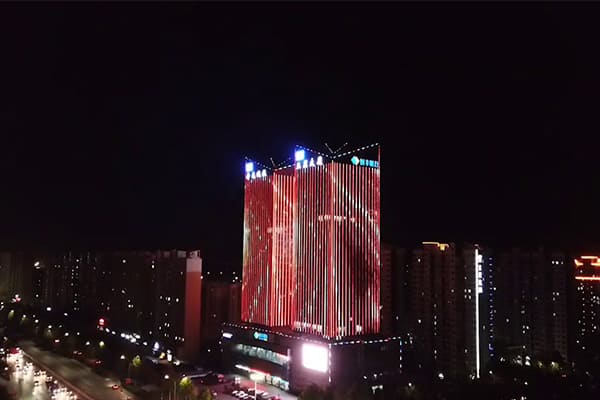
You need to light up a tall flagpole or a skyscraper's spire. A standard flood light just creates a dim glow at the bottom and fades into nothing. You’re wasting energy without achieving the dramatic effect you need. This is where a highly focused beam is essential.
Use a very narrow beam angle1of 5° to 10° when you need to project a powerful, focused column of light over a long distance. It’s perfect for accenting tall architectural columns, flagpoles, and the very top of high-rise buildings.
Think of It as a Light Cannon
I call these fixtures "light cannons5." They don't spread the light; they shoot it. All the energy from the LED chip is compressed into a tight, intense beam. This high center beam candle power (CBCP) allows the light to travel a very long way without losing its punch. The visual impact is incredible. It creates a striking line of light that draws the eye upward and gives a structure a sense of importance and grandeur. It’s not for general lighting. It’s for creating a powerful focal point.
My Go-To Applications
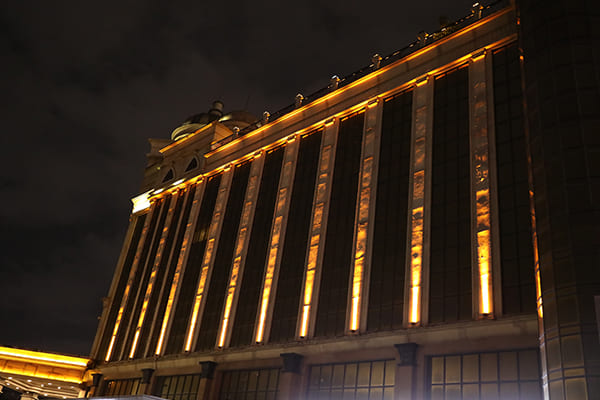
On my projects, I reserve 5° and 10° beams for very specific tasks where distance and precision are everything. This includes grazing the facades of skyscrapers to emphasize their verticality, picking out a distant landmark, or lighting tall, slender columns from the base. You are essentially drawing with light, creating sharp lines and intense highlights. This technique gives a building a strong visual signature at night.
Practical Power Rules
Choosing the right power is critical. A beam this narrow needs the right amount of lumens6 to reach its target. Here are some rules of thumb from my own projects:
| Target Height | Recommended Power | Common Application |
|---|---|---|
| 3 – 10 meters | 10W LED | Architectural pillars, small statues |
| 10 – 20 meters | 18W – 27W LED | Mid-rise building facades, tall trees |
| 50 – 100 meters | 144W – 196W LED | Skyscraper facades, landmark towers |
These aren't exact rules, as surface color and ambient light7 matter. But they are a great starting point for planning.
What is a Narrow Beam Angle (15°) Good For?
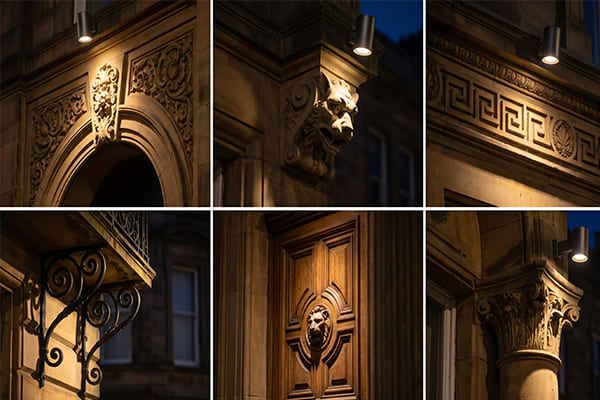
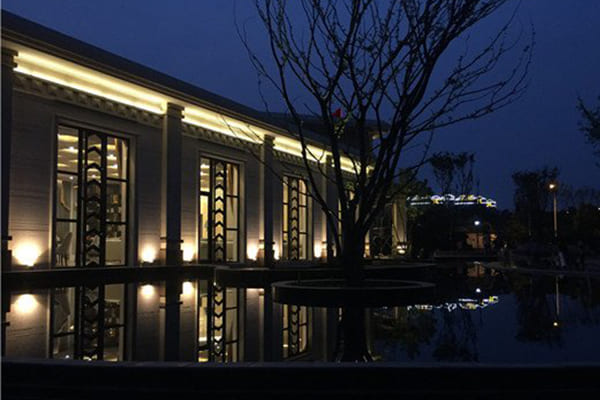
You want to highlight the beautiful details on a building's facade, but a 30° beam is too wide and washes everything out. The light spills onto the windows and flattens the texture you want to reveal. You need more control and a bit more focus to make those features pop.
A 15° beam angle4 is a standard spotlight. It’s perfect for creating contrast and highlighting specific features like window frames, statues, or individual tree trunks. It provides a focused punch of light without being as extreme as a 5° beam.
The Artist's Spotlight
If the 5° beam is a light cannon, the 15° beam is an artist's spotlight. It has enough focus to create strong highlights and deep shadows, which adds a sense of rhythm and depth to a scene. This is the angle I use to "sculpt" with light. Instead of flooding a wall, I can pick out a series of columns, creating a beautiful pattern of light and dark. It makes the architecture more dynamic and interesting at night.
Creating Drama with Contrast
This beam angle4 is my core tool for creating visual drama. On landscape projects, I use it to uplight the trunks of medium-sized trees, separating them from the background. On building facades, I use it to accent cornices, gargoyles, or other decorative elements. The tight control means you put light exactly where you want it and nowhere else. This contrast between the bright, highlighted feature and the darker surrounding area is what creates a high-end, professional look. It guides the viewer's eye and tells them what's important.
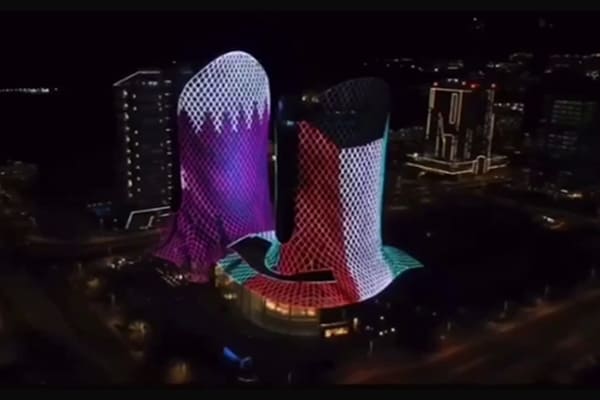
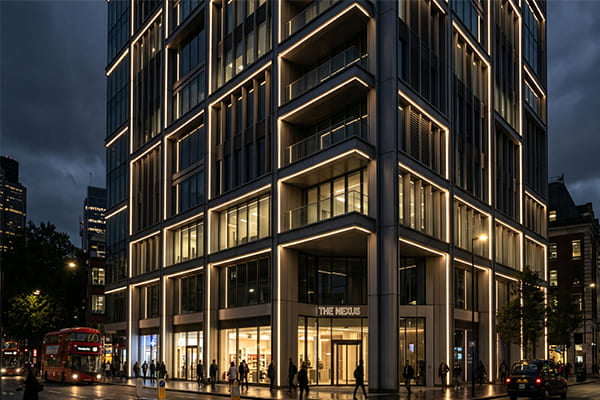
Why Are Medium Beam Angles (30°-45°) So Versatile?
You have a large wall to illuminate, or a wide, mature tree. A narrow beam would create a small, intense hot spot, leaving the rest in darkness. You need to cover more area with a soft, even light. You also need a reliable, go-to fixture for many different situations.
Medium beam angle4s of 30° to 45° are the universal workhorses of outdoor lighting3. They offer the best balance between coverage area and light intensity, making them ideal for wall washing, illuminating large tree canopies, and general landscape lighting8.
The "Works Everywhere" Angle
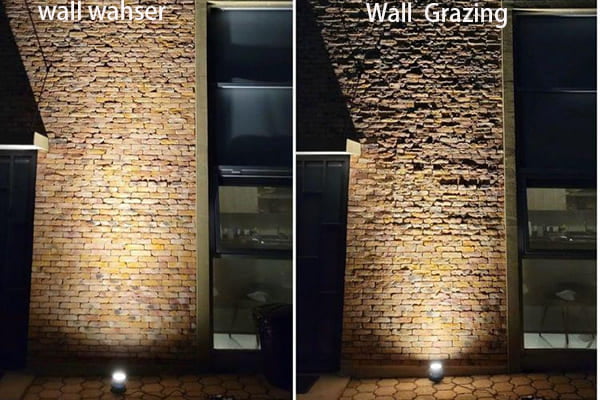
If I could only choose one beam angle4 for a project, it would probably be 30°. I call it the "all-purpose" or "universal" angle. It’s wide enough to smoothly wash a wall without creating distracting hot spots, but still has enough punch to reach the top of a two- or three-story building. Its versatility is why it’s the most common beam angle for linear wall washers and landscape flood lights9. It provides a soft, natural transition at the edges of the beam, which helps lights blend together seamlessly.
Wall Washing and Landscapes
For washing the exterior of commercial buildings, hotels, and homes, a 30° or 45° beam is the industry standard. When you place several fixtures side-by-side, the beams overlap smoothly to create a continuous sheet of light. This technique makes a building look clean, modern, and inviting.
In the garden, this is my preferred angle for lighting the canopies of large, mature trees. The wide spread of light reveals the full shape and texture of the leaves, creating a beautiful and impressive effect. It provides presence without the harshness of a narrow beam.
| Feature | 15° (Narrow) | 30°-45° (Medium) | 60° (Wide) |
|---|---|---|---|
| Primary Use | Highlighting Details | General Washing | Broad Flooding |
| Light Character | Hard, defined edges | Soft, blended edges | Very soft, diffuse |
| Throw Distance | Medium to Long | Medium | Short |
| Coverage Area | Small | Medium | Large |
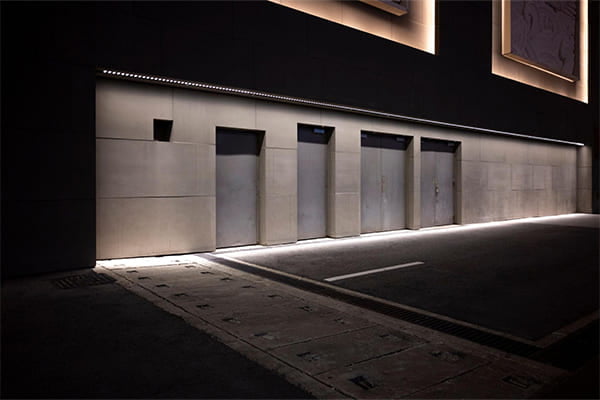
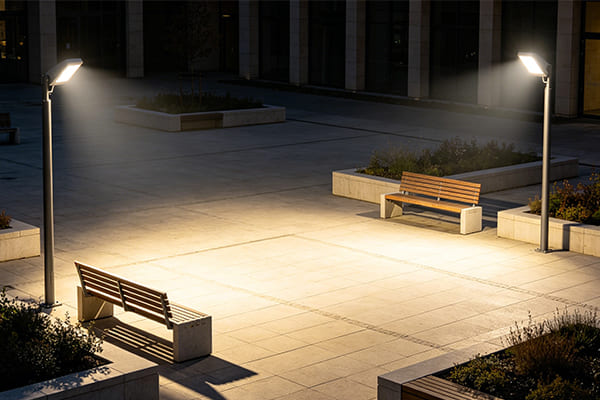
When is a Wide Beam Angle (60°) the Best Choice?
You need to light a parking lot, a wide open plaza, or a large lawn for safety and general ambiance. Using spotlights would be inefficient and create a polka-dot effect. You don't need drama or focus; you need broad, uniform, and gentle illumination.
A wide 60° beam angle4 is a true flood light, designed to spread soft, even light over a large area at a close range. Use it for illuminating open spaces like plazas, lawns, parking lots, and large beds of low shrubs.
Painting with a Broad Brush
Think of a 60° beam as painting with a wide brush or a roller. The goal is not to pick out details but to provide a base layer of light. The throw distance is shorter because the light energy is spread over a much larger area. This results in lower intensity but much greater coverage. The light quality is very soft and uniform, which is perfect for areas where people will be walking or gathering.
Focus on Uniformity, Not Drama
With wide beam angle2s, the key performance metric is uniformity. You want to avoid creating dark patches between fixtures. This is often more important than sheer brightness. I use 60° flood lights to provide security lighting on low perimeter walls, to gently illuminate large flowerbeds from a single point, or to provide ambient light for an outdoor seating area. It’s a functional beam angle that prioritizes comfortable and consistent illumination over dramatic effects. It makes spaces feel safer and more usable after dark.
Conclusion
The beam angle4 is not just a technical spec; it is your most important artistic tool in lighting design10. Choosing correctly is the first step to a successful project. Always remember the basic rule: for height and focus, go narrow (5°-15°); for wide, even color, go wide (30°-60°).
Narrow beam angles are essential for focused lighting on tall structures, maximizing visual impact and energy efficiency. ↩
Wide beam angles provide broad, even coverage, making them ideal for safety and ambiance in large outdoor spaces. ↩
Best practices in outdoor lighting ensure safety, functionality, and aesthetic appeal in your designs. ↩
Understanding beam angle is crucial for effective lighting design, ensuring the right focus and coverage for your project. ↩
Light cannons focus light intensely, perfect for creating dramatic effects on tall structures and architectural features. ↩
Lumens measure light output, crucial for selecting the right power for your flood lights to achieve desired brightness. ↩
Ambient light sets the mood and enhances safety, making it essential for comfortable outdoor environments. ↩
Landscape lighting highlights natural features, creating beautiful outdoor environments that are inviting at night. ↩
Exploring different flood light types helps you choose the best option for your specific lighting needs. ↩
Effective lighting design combines art and science, ensuring spaces are both functional and visually appealing. ↩