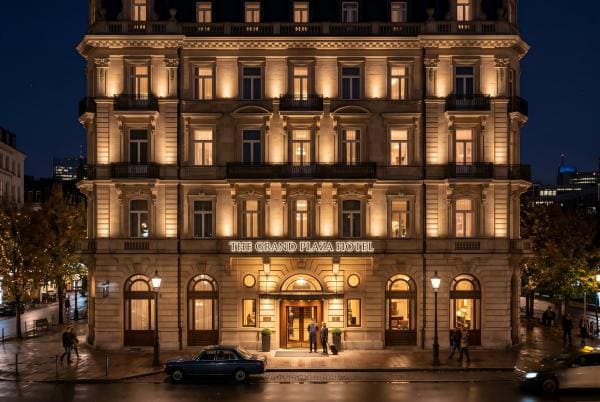
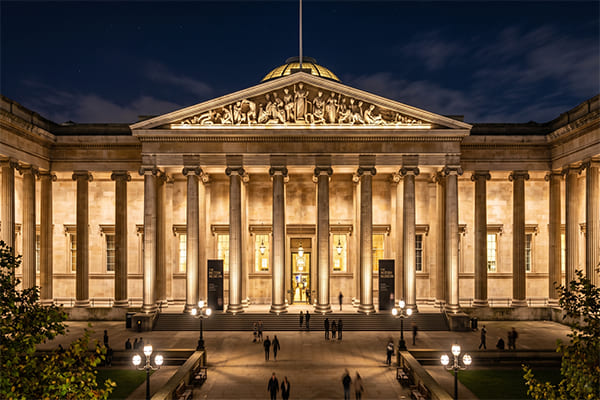
Your museum's stunning architecture disappears after sunset. This leaves a cultural landmark looking dark and uninviting, failing to make an impression. A well-planned lighting scheme can change that entirely.
A successful museum lighting plan uses a layered approach1 to highlight architectural details and concealed installation techniques to preserve the building's daytime appearance. The key is using high-quality LEDs (CRI>90, 2700K-4000K)2 and integrating fixtures seamlessly into the structure, making the light source itself invisible.
Lighting a museum is a delicate balance. We want to celebrate its cultural and architectural value without causing any harm. Over the years, I've learned that the best projects tell a story with light, guiding the viewer's eye and creating a memorable experience. It’s not just about making a building visible; it’s about revealing its soul. Let's explore how to achieve this.
How Do You Create the Perfect Layered Lighting Scheme for a Museum?
A building lit with a single, flat light source looks boring. It lacks depth and character, failing to capture anyone's attention. The secret is to use different layers of light to build dimension.
Create a three-part scheme. First, use wide-beam LED wall washers for a uniform base layer. Second, add narrow-beam spotlights to accent key features. Finally, use a smart control system for an ambiance layer that can create dynamic effects and different moods.
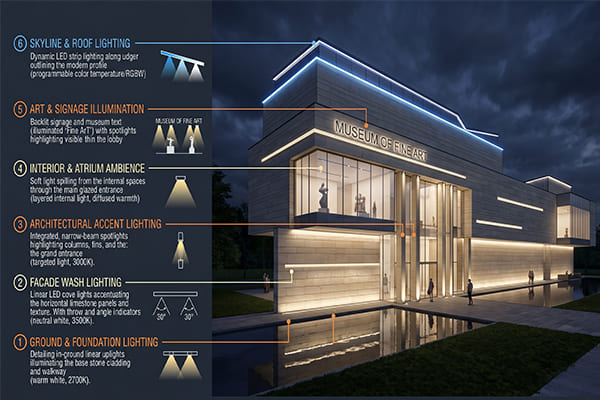
A layered approach is like painting with light. Each layer has a specific job, and together they create a cohesive and beautiful picture. We need to think about the building as a canvas and decide which parts to bring forward and which to let recede into the shadows. The goal is to create visual hierarchy and interest3. I always start by breaking the design down into these three fundamental layers.
The Three Layers of Light
Here is how we build the lighting scheme, layer by layer, to create a stunning final result.
-
1. The Base Layer This is the foundation of your design. We use wide-beam LED wall washers, like our linear lights, to create a soft, even wash of light across the main surfaces. We typically install these fixtures 30 to 50 centimeters away from the wall. This placement ensures the light spreads out evenly, avoiding harsh hot spots. The goal is to achieve an illuminance level between 50 and 100 lux4. This layer sets the overall tone of the building and ensures it has a solid presence at night. It doesn’t create drama, it just provides the canvas for the other layers.
-
2. The Accent Layer This is where we add the character. We use narrow-beam spotlights, with beam angles between 5 and 15 degrees5, to precisely target specific architectural features. Think about elements like cornices, columns, intricate reliefs, or window frames. By highlighting these details, we create contrast, depth, and a sense of three-dimensionality. This layer draws the eye to the most important cultural and historical features of the building, telling its unique story. This is how we turn a flat surface into a dynamic piece of art.
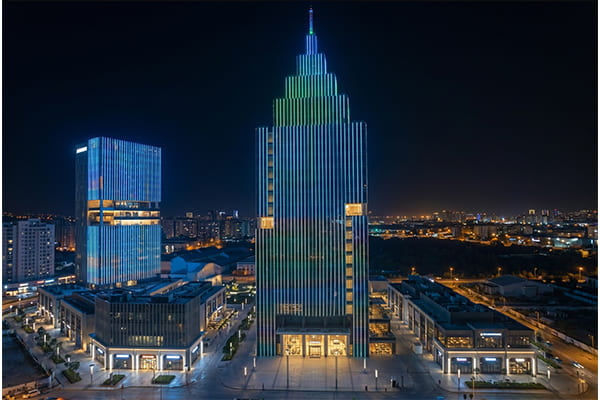
-
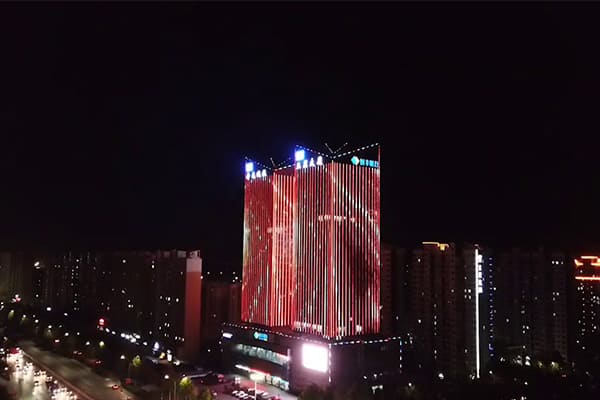
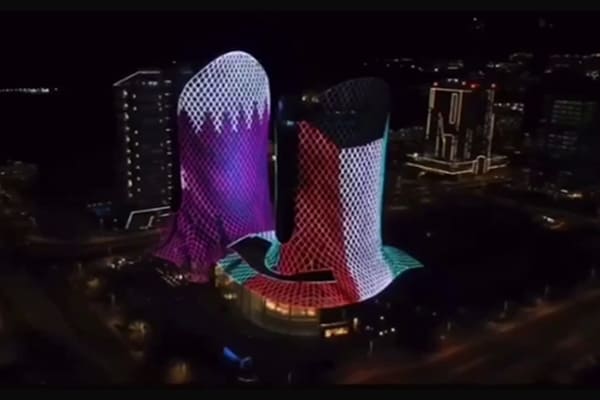
3. The Ambiance Layer This layer brings the project to life. We use a smart control system, often DMX5126, to manage the lights. This allows us to create subtle, dynamic effects or even project custom patterns. For example, we can program a slow "breathing" effect to give the building a sense of life. We can also create different scenes for holidays, special events, or different seasons. This adds a layer of flexibility and creativity, allowing the museum to change its nighttime appearance to match the occasion.
| Layer Type | Fixture Used | Purpose | Key Details |
|---|---|---|---|
| Base | Wide-beam LED Wall Washers | Creates a uniform foundation of light | 30-50cm from wall; 50-100lx |
| Accent | Narrow-beam Spotlights (5°-15°) | Highlights key architectural features | Focus on columns, reliefs, eaves |
| Ambiance | Smart Control System (DMX512) | Adds dynamic effects and atmosphere | Custom projections, multi-scene modes |
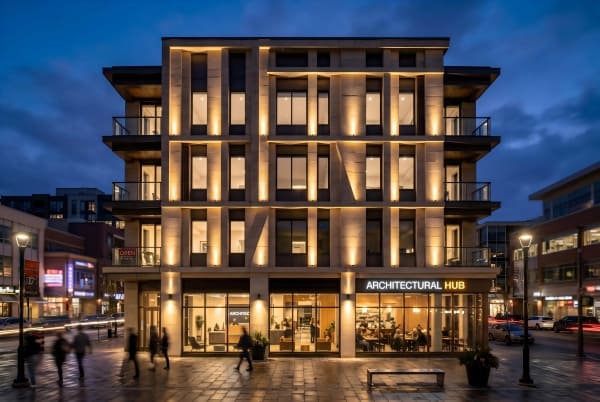
What Are the Best Techniques for Concealing Lighting Fixtures on a Facade?
Visible lights and cables can completely ruin a beautiful facade. They look clunky during the day and create distracting glare at night. The goal is to make the light source totally invisible.
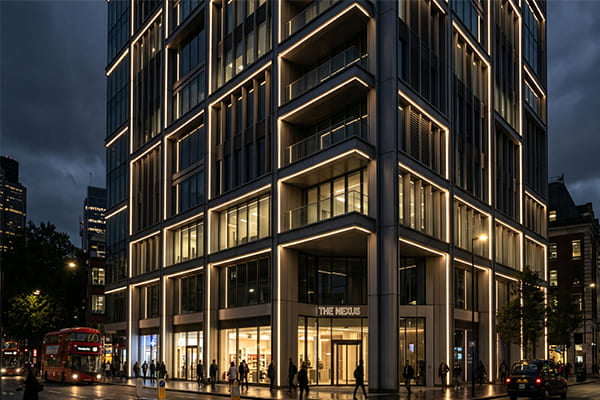
The best technique is to follow the "see the light, not the fixture7" principle. You can achieve this by integrating fixtures directly into the building's structure, such as under eaves or in stone joints, and camouflaging them by matching their color to the building materials.
I remember a museum project we worked on in Southeast Asia. The architect was very clear: he did not want to see a single light fixture on his facade. This challenge forced us to get really creative. We worked closely with the construction team to find clever ways to hide everything. This experience taught me that concealment isn't an afterthought; it must be part of the plan from the very beginning. True success is when a visitor looks at the building and wonders where the beautiful light is coming from.
Core Concealment Strategies
Here are the key methods we use to make our lighting installations disappear.
-
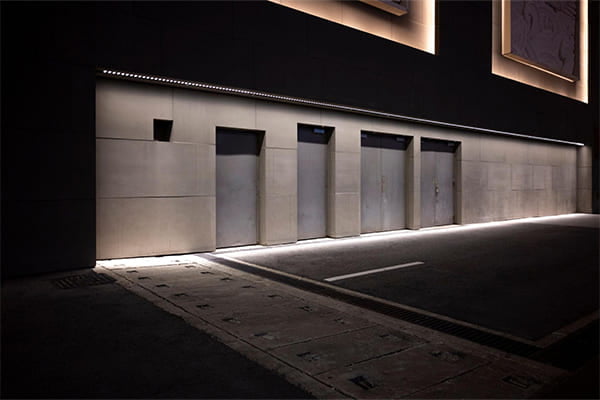
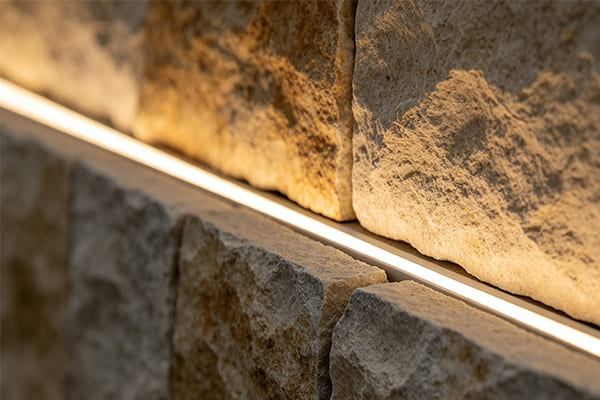
Structural Integration The best way to hide a fixture is to make it part of the building. We often hide uplights in the recesses under eaves or cornices, so they are completely invisible from the ground. For walls with stone cladding, we can embed slim linear LED lights directly into the seams between the panels. This makes it look like the light is naturally glowing from within the structure. We also use in-ground uplights with an IP67 rating8, installed perfectly flush with the pavement, to light the building from below without creating a tripping hazard.
-
Color Camouflage and Glare Control When a fixture cannot be fully hidden inside a structure, we make it blend in. We can customize the color of the fixture's housing to perfectly match the building material. We use the RAL color system9 to ensure an exact match with the stone, brick, or metal. This makes the fixture much less noticeable during the day. At the same time, we always add shields, louvers, or hoods10 to the fixtures. These accessories block the light source from direct view, preventing uncomfortable glare for visitors and passersby.
-
Remote Power and Cable Management A big part of a light fixture is its driver, or power supply. By placing the drivers in a remote, centralized location—like an equipment room or a waterproof cabinet—we can use much smaller and slimmer light fixtures on the facade. This makes them far easier to conceal. It also has a huge maintenance benefit. Instead of needing a crane to fix a driver high up on a wall, an electrician can simply work in the central equipment room. We apply the same thinking to cables, running them through hidden cavities or burying them underground in waterproof conduits to keep them completely out of sight.
What Technical Specifications and Installation Details Should You Never Overlook?
Choosing the wrong product can lead to a project disaster. Water can get into the lights, they might start flickering, and repairs can become a costly nightmare. You must focus on the right technical details to ensure the system lasts.
Always choose fixtures with an IP65 or IP67 rating for weather resistance. Use a reliable control system like DMX512 for dynamic control. For historic buildings, insist on non-damaging mounting methods. Most importantly, always perform an on-site mock-up11 before the final installation.
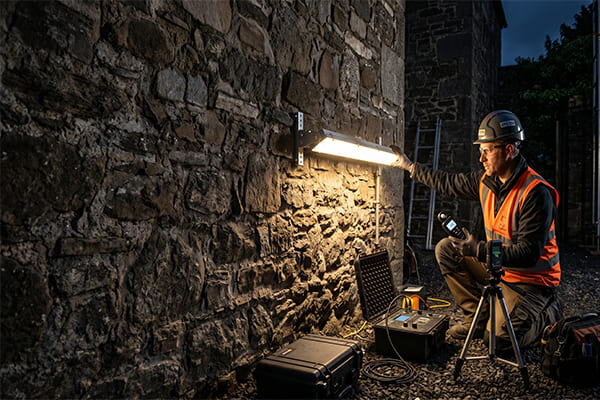
I can't stress the last point enough. I once had a project where the computer rendering looked perfect. But when we did a mock-up on-site, the light looked completely different. The specific type of stone on the building was much more reflective than we had anticipated. The facade was almost 30% brighter than our calculations suggested. That simple on-site test allowed us to adjust our plan and select a lower-wattage fixture. It saved the entire project from looking over-lit and garish. Never skip the mock-up.
The Technical Checklist
Here are the critical details that ensure a professional and long-lasting installation.
-
Protection and Control Outdoor fixtures face rain, dust, and temperature changes. An IP rating tells you how well it is protected. IP65 means it is dust-tight and protected from water jets, which is a good minimum. IP67 means it can even be temporarily submerged in water, making it ideal for in-ground fixtures. For control, the DMX512 protocol is the industry standard. It gives you precise control over every single fixture, allowing you to create smooth dimming and dynamic effects, like the gentle "breathing" of light that adds a sophisticated touch.
-
Installation on Historic Buildings You cannot simply drill holes into a historic landmark. Preservation is the top priority. For these sensitive projects, we use non-damaging installation methods12. This can include specialized clamps that grip onto existing structural elements, powerful magnetic mounts, or secure straps. These methods ensure the lighting system can be installed—and later removed—without leaving any permanent marks on the precious building fabric.
-
Design for Maintenance A lighting system is a long-term investment, so maintenance must be easy. We always design with this in mind. Using modular fixtures means if one part fails, you can easily swap it out without replacing the whole unit. As I mentioned before, centralizing the drivers in a remote location is a huge part of this. It simplifies troubleshooting and repairs immensely. We also make sure to plan for access points and document everything clearly so the facility's maintenance team knows exactly how to service the system in the future.
Conclusion
Creating a beautiful lighting scheme for a museum comes down to three things: a smart, layered design, clever concealed installation, and a focus on the right technical details for longevity.
"Momentous and Momentary - Illuminating Engineering Society", https://ies.org/lda/momentous-and-momentary/. A lighting-design reference from an architectural lighting body describes layered lighting as the combined use of ambient, accent, and task or decorative light to establish hierarchy and depth in a space or on a surface. Evidence role: expert_consensus; source type: institution. Supports: A successful museum lighting plan uses a layered approach to highlight architectural details.. Scope note: The source may address architectural lighting broadly rather than museum facades specifically. ↩
"What do I need to know about LED lighting in museums? / James ...", https://aata.getty.edu/primo-explore/fulldisplay?docid=GETTY_AATA9934106394701551&context=L&vid=AATA&lang=en_US&search_scope=AATA&adaptor=Local%20Search%20Engine&tab=aata&query=sub%2Cexact%2CLEDs%20(electron%20tubes)%2CAND&mode=advanced&offset=20. Lighting guidance from a museum or conservation institution explains that color rendering and correlated color temperature affect object and surface appearance, and that high color-rendering sources are commonly used where faithful visual perception is important. Evidence role: expert_consensus; source type: institution. Supports: Museum facade lighting should use high-quality LEDs with CRI above 90 and a correlated color temperature between 2700K and 4000K.. Scope note: Such guidance supports the relevance of CRI and CCT but may not prescribe the exact CRI>90 and 2700K–4000K range for every museum exterior. ↩
"Design Fundamentals: Elements & Principles", https://guides.lib.berkeley.edu/design. Architectural lighting literature describes contrast, focal emphasis, and luminance variation as methods for guiding visual attention and establishing hierarchy in the built environment. Evidence role: mechanism; source type: education. Supports: Layered facade lighting creates visual hierarchy and interest.. Scope note: The evidence supports the visual-design mechanism generally and does not prove that any particular museum facade will be perceived as more interesting. ↩
"Architecture - Wikipedia", https://en.wikipedia.org/wiki/Architecture. An exterior or architectural lighting guideline gives typical maintained illuminance ranges for building facades or outdoor pedestrian visual tasks, providing context for the stated 50–100 lux base-lighting target. Evidence role: statistic; source type: institution. Supports: A museum facade base layer can target an illuminance level between 50 and 100 lux.. Scope note: Illuminance targets vary by facade material, surrounding brightness, local regulations, and conservation requirements, so the cited range should be treated as contextual rather than universal. ↩
"Point Perfect Narrow Beams - USAI Lighting", https://www.usailighting.com/point-perfect-narrow-beam-downlights. Lighting-design references define narrow beam spreads as suitable for accenting discrete architectural elements, supporting the use of small beam angles for concentrated highlights. Evidence role: mechanism; source type: institution. Supports: Narrow-beam spotlights with beam angles between 5 and 15 degrees can be used to accent specific architectural features.. Scope note: The source may support narrow-beam accent lighting generally without validating the exact 5°–15° range for all columns, reliefs, or window frames. ↩
"RDM (lighting) - Wikipedia", https://en.wikipedia.org/wiki/RDM_(lighting). The DMX512 standard is documented as a digital communication protocol for controlling stage and architectural lighting equipment, including multiple channels of dimming and effects control. Evidence role: definition; source type: institution. Supports: DMX512 can be used as a smart control system to manage dynamic facade lighting effects and scenes.. Scope note: The source establishes the protocol’s function and common use; it does not assess whether DMX512 is the best control choice for a specific museum project. ↩
"halo | Light - Cornell University - Intypes", https://intypes.cornell.edu/expanded.cfm?erID=166. Architectural lighting guidance on concealed and integrated luminaires explains that hiding the light source can reduce visual clutter and emphasize illuminated surfaces rather than equipment. Evidence role: expert_consensus; source type: education. Supports: Concealing facade fixtures helps preserve the visual appearance of the building while emphasizing the light effect.. Scope note: This supports the design principle in general terms and may not use the exact phrase quoted in the article. ↩
"IP code - Wikipedia", https://en.wikipedia.org/wiki/IP_code. The IEC ingress-protection classification defines IP67 as dust-tight equipment protected against temporary immersion in water under specified test conditions. Evidence role: definition; source type: institution. Supports: IP67-rated in-ground uplights are protected against dust and temporary water immersion.. Scope note: An IP67 rating describes laboratory-tested enclosure protection and does not alone guarantee long-term durability under all installation, chemical, or maintenance conditions. ↩
"List of RAL colours - Wikipedia", https://en.wikipedia.org/wiki/List_of_RAL_colours. A reference on the RAL colour system describes it as a standardized European colour-matching system used to specify consistent colours for paints, coatings, and materials. Evidence role: definition; source type: encyclopedia. Supports: The RAL color system can be used to specify fixture housing colors that match building materials.. Scope note: The source supports the role of RAL in colour specification, not the practical accuracy of any individual fixture-to-stone colour match. ↩
"International - Wikipedia", https://en.wikipedia.org/wiki/International. Outdoor lighting guidance from dark-sky or lighting-engineering institutions explains that shielding and cut-off accessories limit direct view of the lamp and reduce glare and light spill. Evidence role: mechanism; source type: institution. Supports: Shields, louvers, or hoods can reduce direct glare from facade lighting fixtures.. Scope note: The source supports glare-control principles generally; actual glare reduction depends on fixture optics, mounting height, aiming, and site geometry. ↩
"[PDF] Design and evaluation of an LED-based light fixture", https://www.lrc.rpi.edu/s/SPIE5187-43_Gu.pdf. Architectural lighting design guidance identifies full-scale or on-site mock-ups as a method for evaluating beam distribution, brightness, material reflectance, and visual effects before final installation. Evidence role: case_reference; source type: education. Supports: An on-site lighting mock-up can reveal material and visual effects that differ from computer renderings or calculations.. Scope note: The evidence supports mock-ups as a design-validation method; it does not substantiate the article’s anecdotal claim about a facade being 30% brighter than calculated. ↩
"The Secretary of the Interior's Standards for the Treatment of Historic ...", https://www.nps.gov/articles/000/treatment-standards-rehabilitation.htm. Historic-preservation guidance emphasizes minimal intervention and reversibility when adding services or equipment to historic fabric, supporting the use of mounting methods that avoid permanent damage. Evidence role: expert_consensus; source type: government. Supports: Lighting installations on historic buildings should use non-damaging and reversible mounting methods.. Scope note: The source supports preservation principles rather than evaluating specific clamps, magnets, or straps for structural safety on a given building. ↩